Amitav Roy
Blog on web and travel
SPA with L5 and Angular: Setting up the REST controller
Posted on 2 Apr 2015 by Amitav Roy
Introduction
In the last tutorial Working with Faker to create dummy data I have showed how we can use the library to seed some random content. Now that we have things in place, it’s a good starting point to create some REST endpoints which can be consumed by out Angular application.
The Resource controller
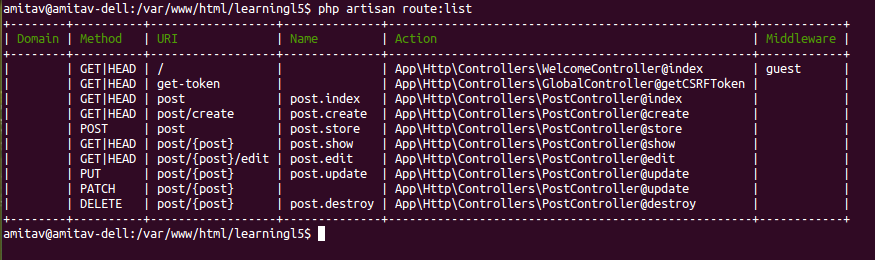
First I have created a resource controller PostController and registered that in our route:
Once that is done, if we check the route list command through command line “php artisan route:list” we can see that all the methods are now available. We have a GET url which will ideally give me all the posts. There is a POST where I will post data so that a new post is created. Then there are other REST endpoints as well like PUT and PATCh for edit and DELETE to delete a post. So basically we have all the main REST methods in place. We just need to write the required methods.
The main method implementations
So to start with, lets add the code for the simple methods – index which will show a list of posts based on the parameters; show which will show details of the post based on the identifier provided and last destroy the post if the user is owner of the post and also send the token.
So first I have defined a few class attributes like default take, default skip, current user etc. Once done, in the constructor I have hardcoded user 1 to be logged in so that when I am saving the post, I have a logged in user. This is required because if you see my first tutorial in this series: Events in Laravel 5 and customizing Model save you will see that I am firing an event and for that, I need the current user. Basically, I don’t want the post to be created if the user is not logged in.
Once this is done, in the index I am checking if the request has some parameters and based on that I am building the query. The coming on to the next method which is the show method – here we get the id of the post as a parameter and we are trying to find a post based on the same. If we do, then we return a 201 success response with a message and the data object which will have the post. And then the destroy method – here we again take the identifier of the post the id, check if the current logged in user is the owner of the current post. If so, we do allow him to destroy the post. Else send an error back.
And then last but one of the most important – the store. In this, we are passing the Request object which will have all the post elements. With that, we have saved the post and if we get a success we are returning the success response with the message and data or else a 500 error response.
[NOTE: Just a reminder that I have the Token-based authentication on, hence each of this token expects that an X-CSRF-TOKEN is passed as a header. I have created a URL which gives the access token and this is something which I am doing through POSTMAN. This I have shown in screenshots below.]
And now it’s time to check how to REST endpoints are working. For this, I will be using POSTMAN plugin from Chrome to mock the REST calls. I am providing screenshots which will help understand how it’s used.
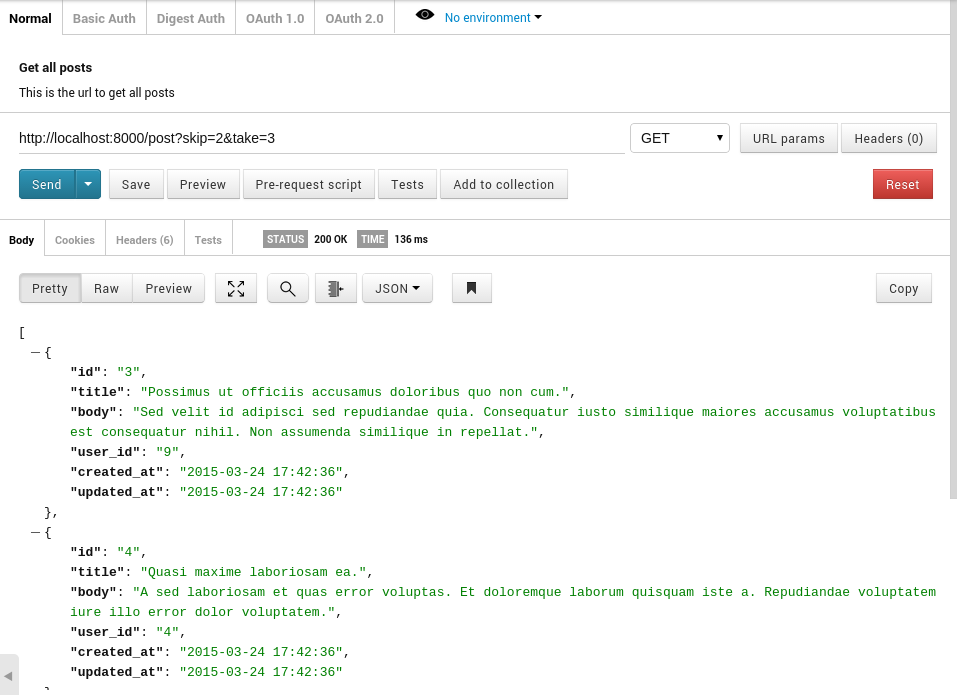
This is a simple GET request with additional parameter skip and takes which will device how many post we want to take.
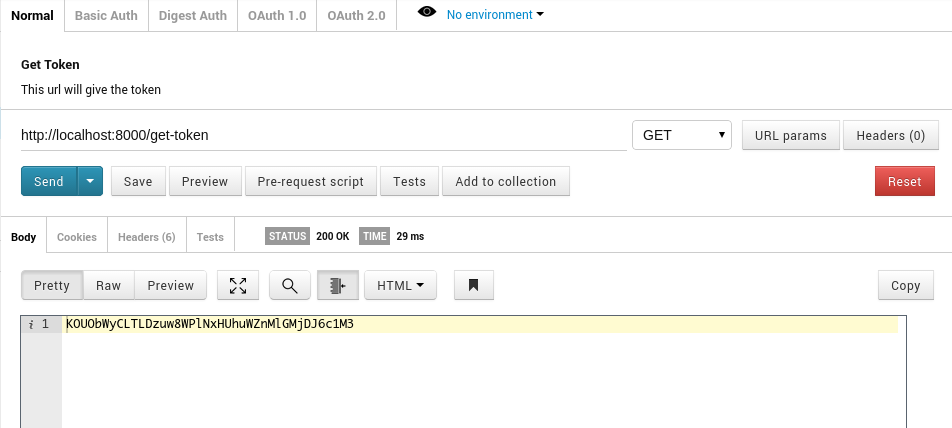
In this screenshot, I have fetched a token. Again this is a GET request and this is mainly to fetch the token which we will, later on, pass to POST and DELETE method.
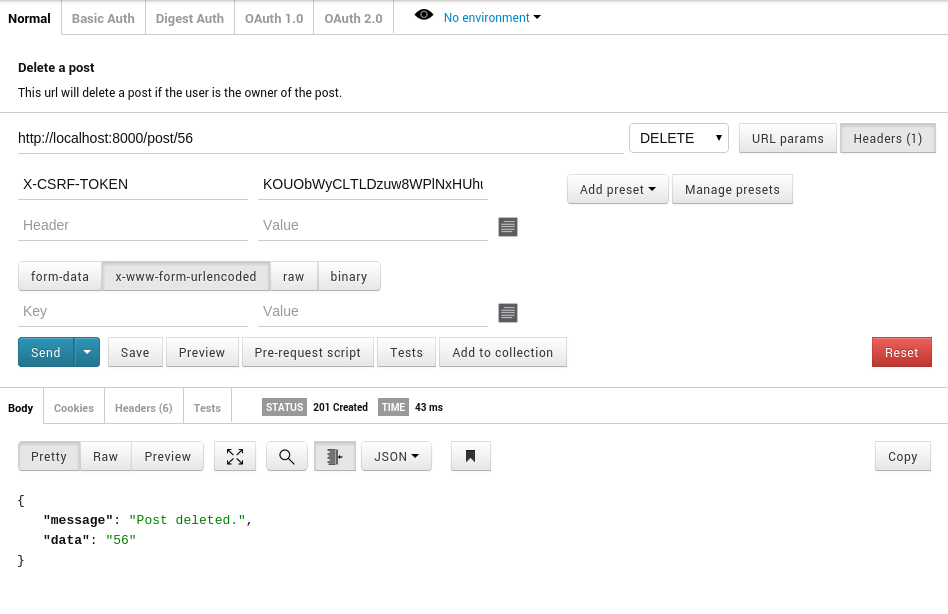
This is a DELETE endpoint. Which means the method should be the same. And for this method to work, I will have to send the X-CSRF-TOKEN which will be validated through the middleware before doing any action in the controller.
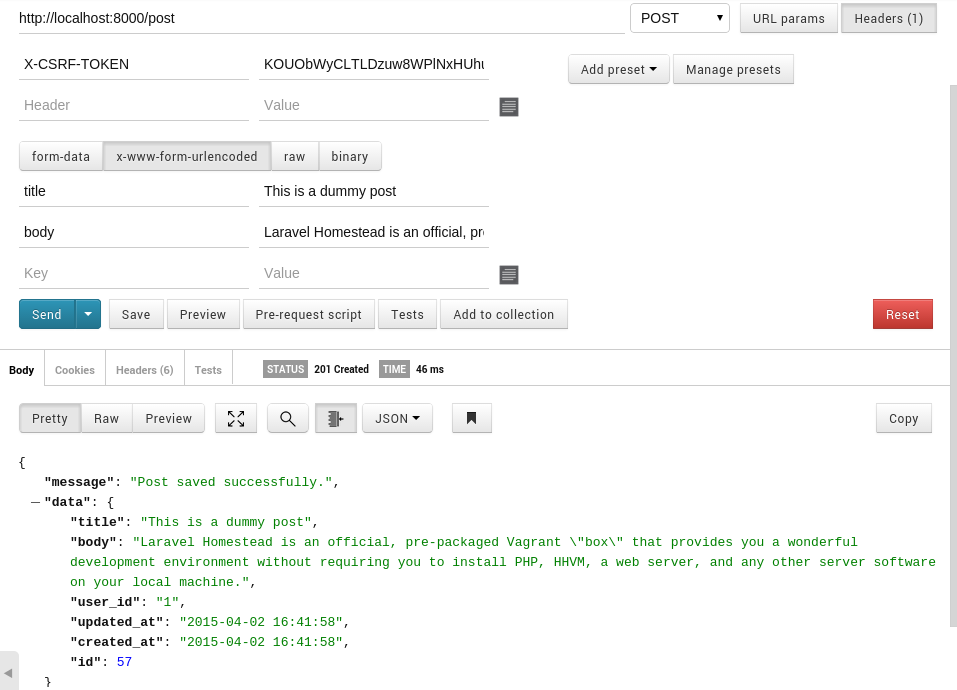
In this, I am sending title and body. And based on the X-CSRF-TOKEN it validates if the request is correct and then process the POST request and creates the post entry.
The entire code base can be found here.