Unlocking the Power of Customer Retention: Strategies to Boost Loyalty and Increase Purchase Rate

Blog on web and travel
Posted on 27 Mar 2022 by Amitav Roy
Newsletter is one form of content which has been quite popular. It has been the de facto for many brands and e-commerce websites to communicate with their customers. And it has also been a great way of reaching out for individuals to others who share similar interests.
Personally, I have been following quite a few individuals and sites for their good quality content which not only allows me to keep myself updated but also help understand the trends in the industry.
So, if you are an individual looking at communicating with Users using a Newsletter, this blog article will help you a lot. In this solution, we are going to use Laravel along with the SendGrid API to build a contact list which users will be subscribing to from your website.
So, here is the flow that we are going to work on:
By the way, you can find the entire code for the application which has the Laravel code on this Github repository. In this video I am going to walk you through the high level gist of how to do this.
So, without further ado, let’s get started.
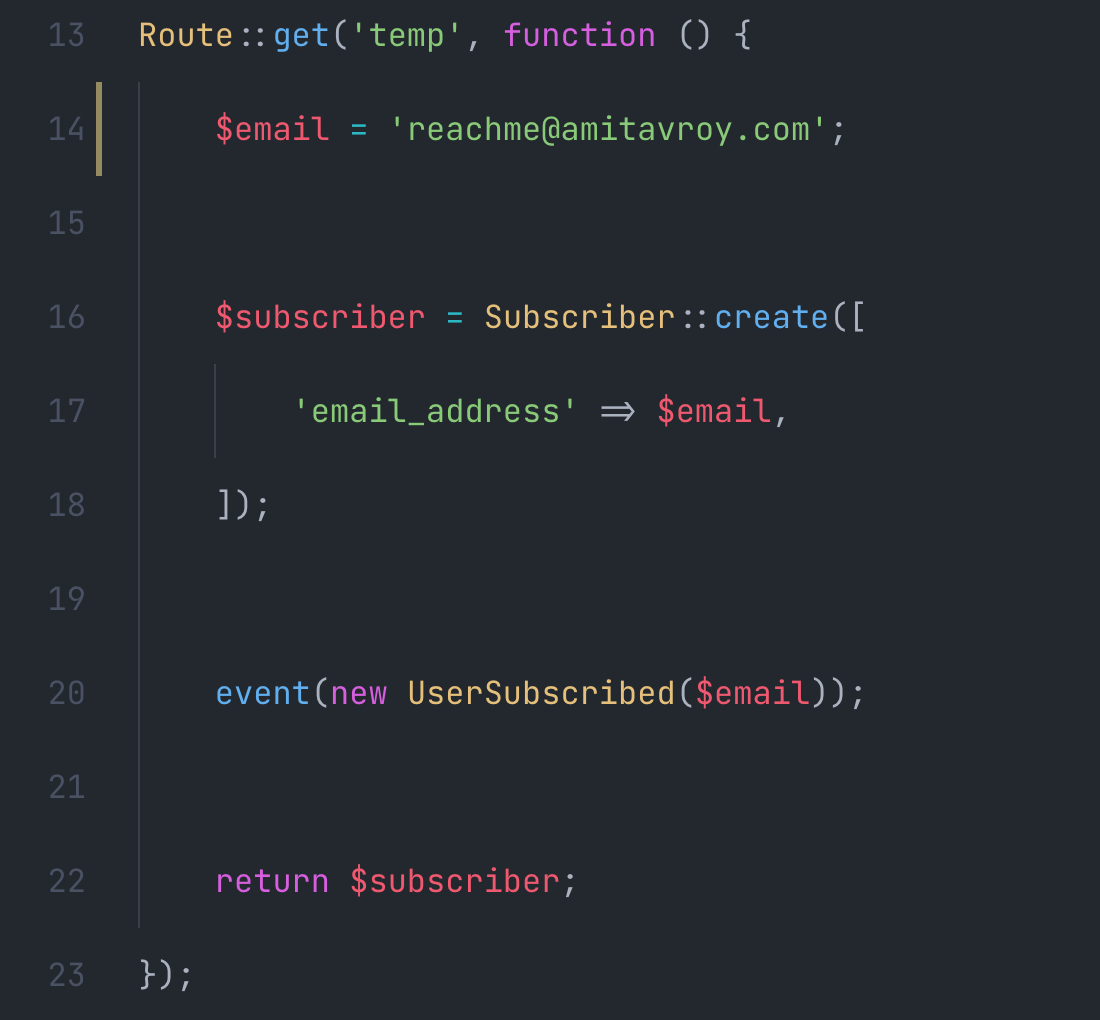
First, what we are going to do is create an API which will take an email address and make an entry into the database. Once done, it will email to the end user by firing an event. This email will have the link which the user needs to click to verify their email address. Do note that it is very important for you to ensure that the email address that you have is verified, and the user has consent. If this is not done and Users start marking your emails as spam, then it can have a negative impact on your reputation.
So, here is the code of our first API making the DB entry of email and sending verification email:
Because sending email is a time-consuming process and can be done on a different thread, we are raising an event. And the listener to that event will be responsible for sending the email.
Once this is done, we will get an email where we will get a link to click. We are using Laravel's signed URL feature to ensure that the token which is coming to the route is correct. And, once the verification is done, we will mark the user as verified and also push the email address to the SendGrid contact list.
Here is the code for the same:
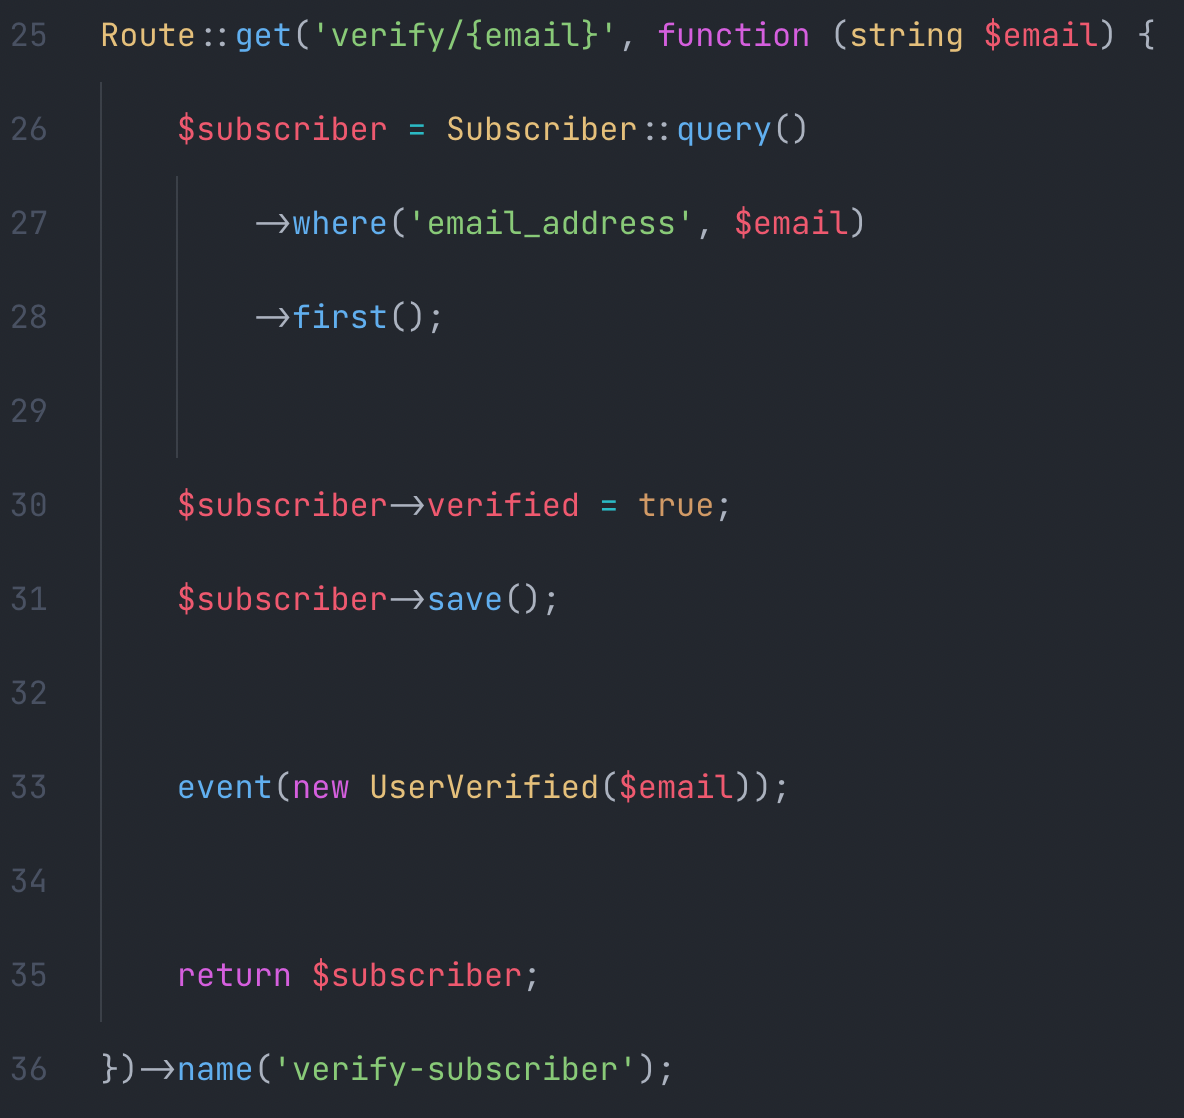
Even here, if you see, we are raising an event which is being listened to by a listener responsible for sending the email to SendGrid contact list. Once this email is pushed to SendGrid, we have an automation inside our SendGrid account which comes into action.
When the email is pushed to the SendGrid contact list, it’s a good time to welcome the user and send a quick email with some of the popular content you have, isn’t it. Why should you miss an opportunity to market your content when the user has subscribed and showed interest in your content.
Inside the SendGrid marketing section, we will create a new automation. The rule of this automation is that when a new email is added to the contact list, a welcome email will be sent to the User.
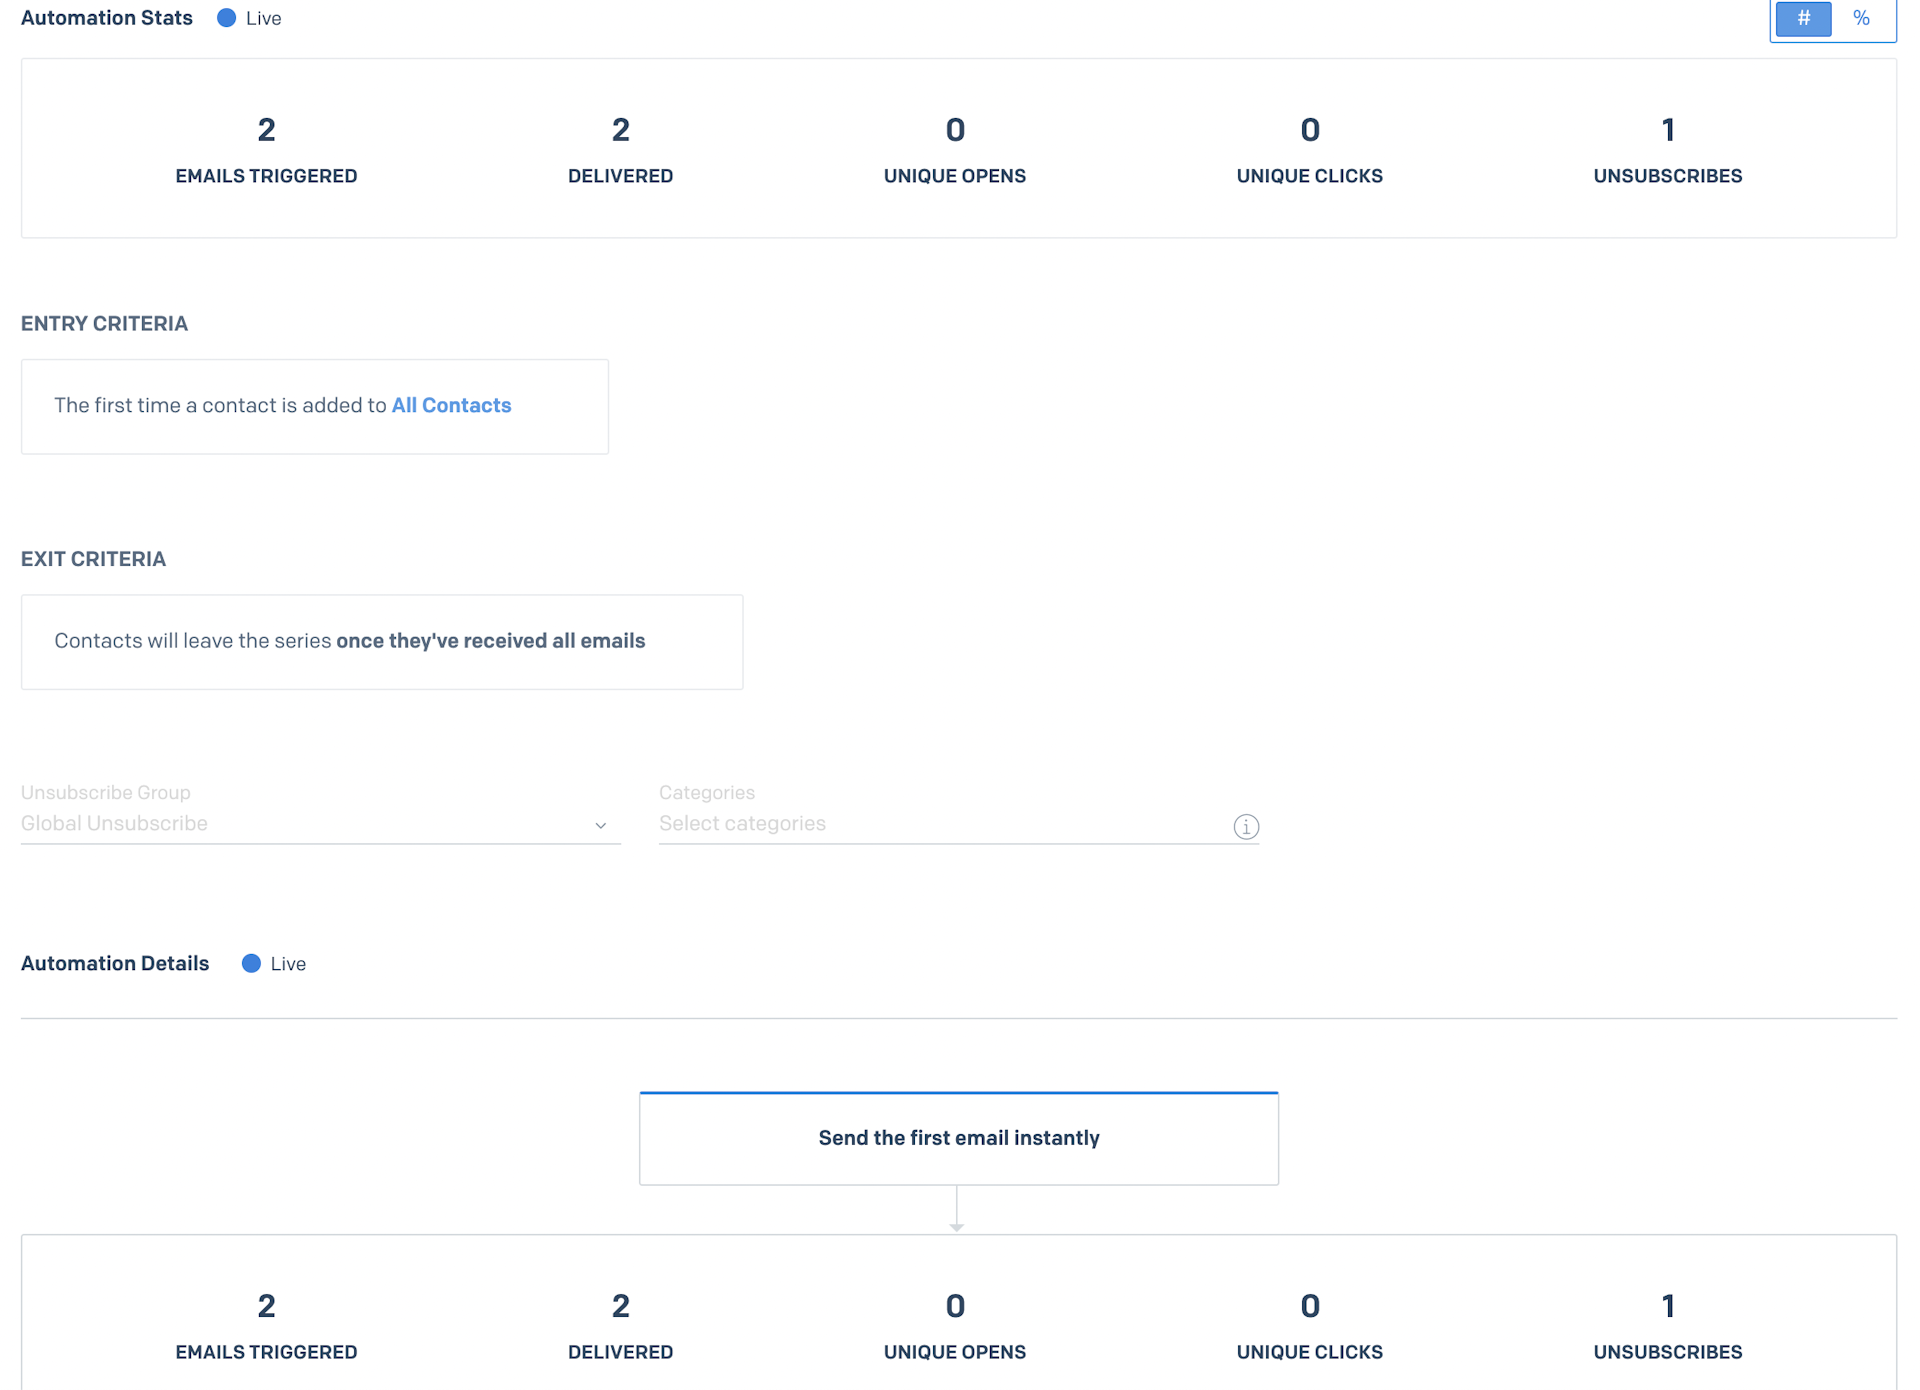
You can see that we have this automation with the Entry criteria and a general stats showing the current state of our automation. Obviously, this is done on a demo account and hence the counts are few based on the testing that I have done. But you should get the gist.
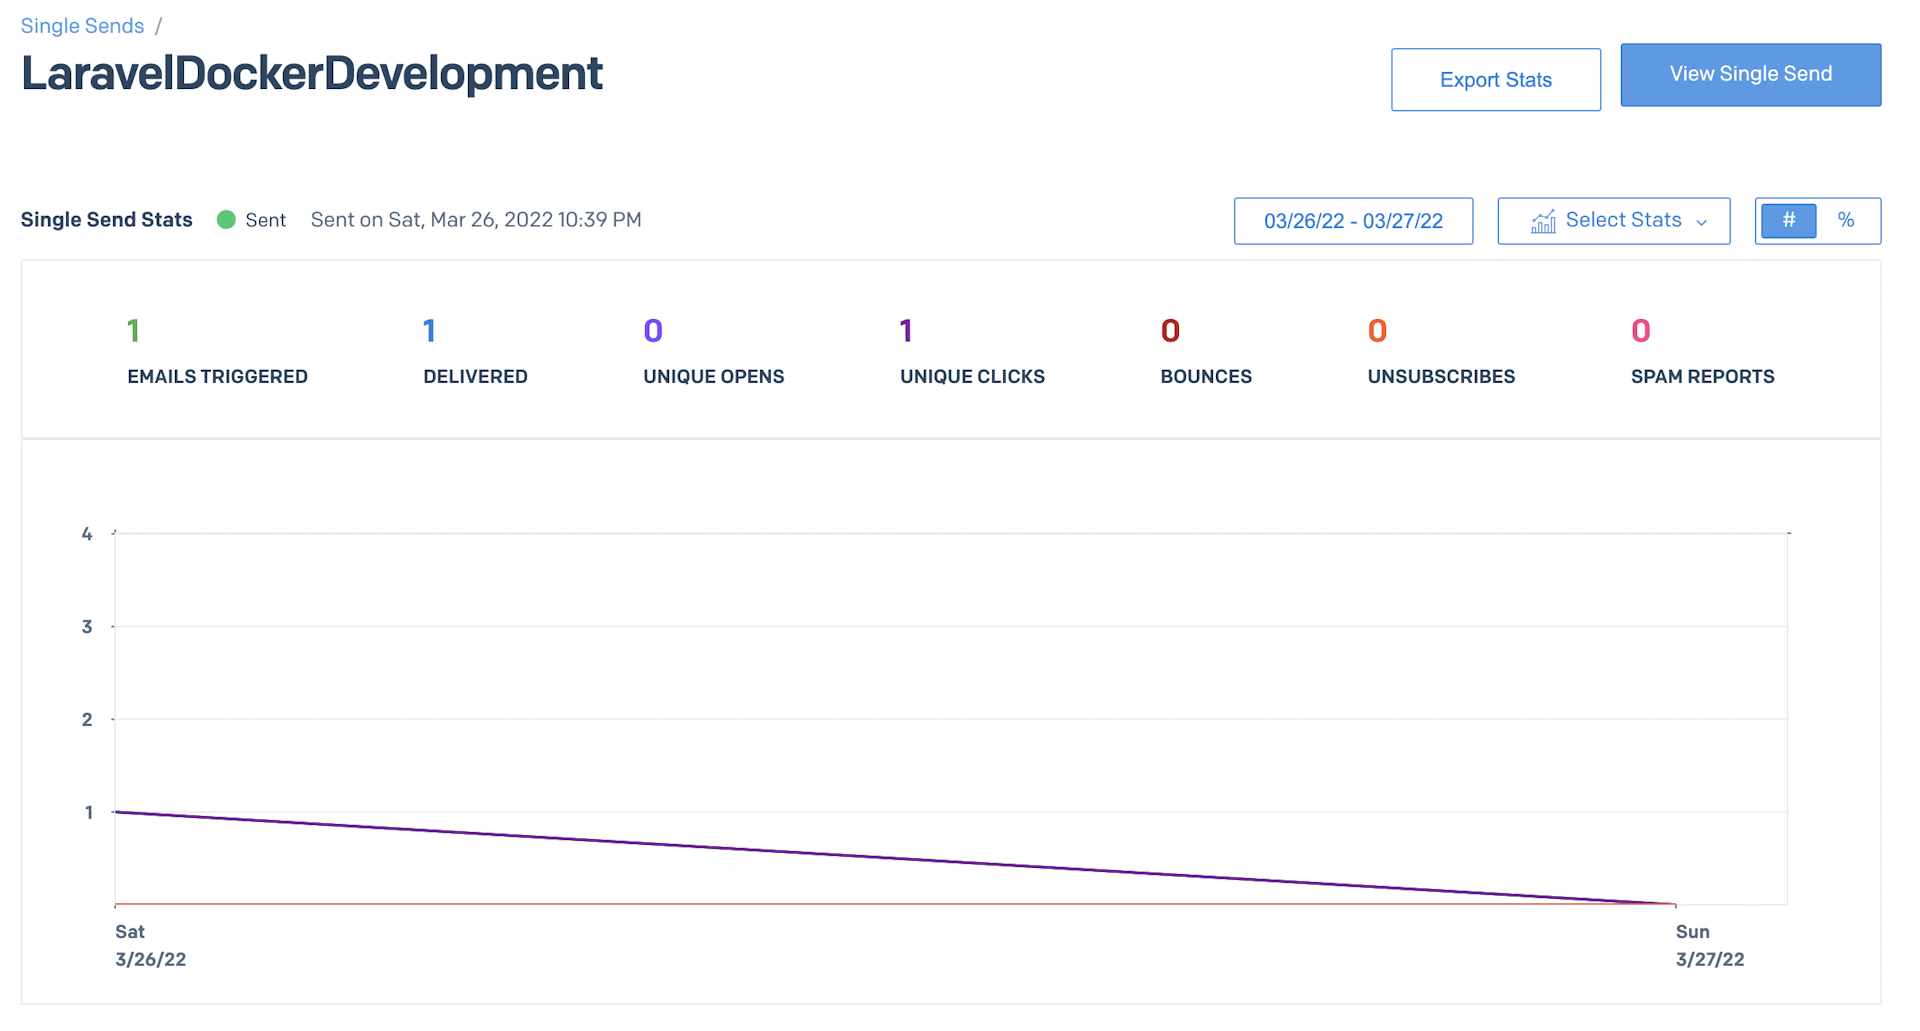
Doing this, we complete our welcome process. And, now it’s time to see what SendGrid has to offer to create an email marketing campaign and send it to our contact list.
Here in the screenshot below, you will see the stats from the Demo single send that I had created.
Again for this, we go into the Marketing tab and create a new Single send. We can use the Visual designer to use the very easy and intuitive drag and drop style email creator. However, if you are an HTML developer, you can even go about developing your own HTML and CSS and then use that as your template to send the email campaign.
Below, you can see the GUI which I used to create the email template
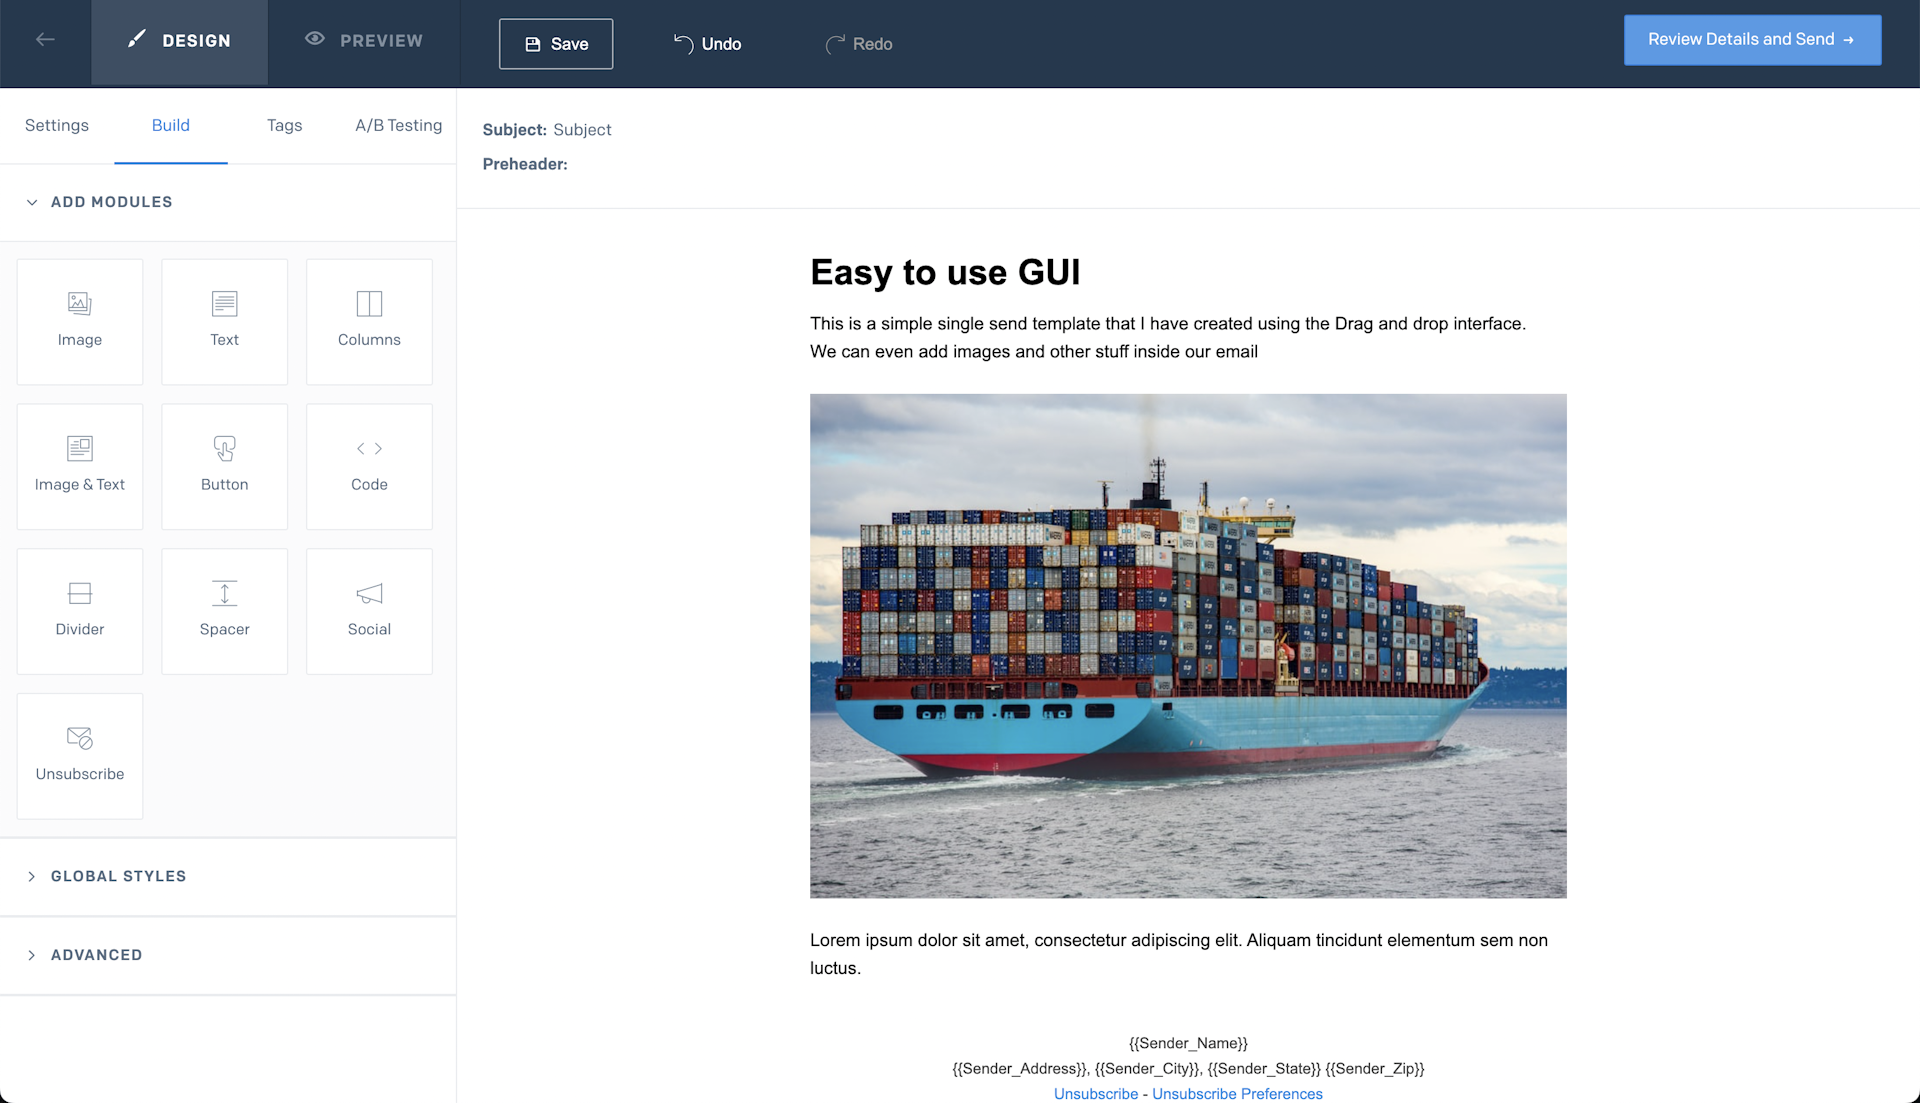
In this fashion, it becomes very easy to have your own subscriber list on your website or blog. SendGrid is a very popular service provider when it comes to sending emails and Marketing campaigns. And, with the easy-to-use API and GUI, sending emails to your subscribers can be very easy.
So, what are you waiting for? Just start implementing this and build your subscriber list and send them content that will keep them interested.
Photo by Solen Feyissa on Unsplash