Google chrome 10 beta – Better javascript performance
Blog on web and travel
Posted on 16 Feb 2013 by Amitav Roy

Organising page mark up and having separate partials inside Code Igniter is something which I really enjoy and it is very important when you project has a lot of pages. It's part of the MVC pattern which most of us would typically follow for our application architecture. Laravel is also one such framework which does that and you can read more about how I implemented MVC pattern to build my blog.
The basic idea is to have all the repeating elements of the page as individual views and only work on the piece of content which is required. This also helps the themer work in sync with the development process.
Here is how I see my views and partials forming a single page:
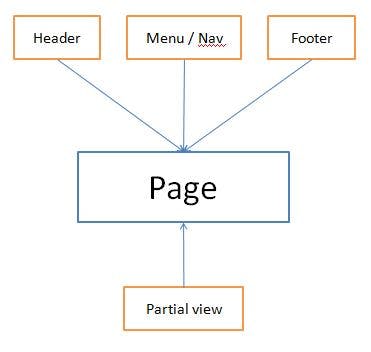
This shows that the main page is using four different views. This is how I generally divide my page layout. There can be more partials forming your main layout depending upon the need.
Header: This view is where the HTML tag starts, the title, scripts, css and meta tags are added and it also opens the body tag for me. Nothing more than that. I also put some code to dynamically add javascript files and css files inside this view.
Menu / Navigation: This view holds my menu, breadcrumb markup. I have used Bootstrap CSS framework in quite a few of my projects and one thing is for sure – the menu markup has a lot of nesting. And to have all of them inside the main layout will soon bloat up your main layout and you won’t feel like working on it :). So, I put that as an individual view.
Footer: This is where I will add the rest of the footer markup. Sometimes the Google analytics code, and also script tag code if there are some javascript files which I would like to load after the HTML markup to speed up the page load.
Partial view: This is the content view which will come from the controller. I will be using the main page layout, pass this view as part of the view data and then the main view will render this view and the data for that particular page will be passed into it.
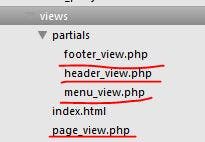
So, let’s create a few files:
Now, we will create the default template that is showcased on Twitter Bootstrap site. Click here to view the template. This is the Bootstrap starter template.
So, first we will set up the header_view inside the partials folder which will container all the header code and the css file inclusion. Here is the view code:
I have made a few changes to the default template to use this with Code Igniter. The first is to echo the base_url function to get the url from the CI framework. And also I have added the html5shiv js from the cdn instead of storing it locally.
Once this is done, we will need to take care of the menu. If you see the markup the navigation code comes before the start of the container tag. So, when the final layout view is built, we need to take care of that.
And then the easy part is the footer view which does not have much for now. Here I have removed the script tags because we will be loading them later or through the controller as per our requirement.
Now comes the page_view which is kind of the main container view and will be calling all the partials and finally build the page.
In this you will see that I have user the code igniter function to load the view – the partials which we have created. First is the header then the menu ahead of the container div and then last is the footer. Once this is done, we create a controller home.php and inside the index function we call the page_view view. Once this is done, we will get the full page as we wanted.
Here is the code for the controller
You can find the final code on Git hub on this link: Github code
You can also read up more on my other web blog articles for more fun stuff.
